Why you should test?
The idea behind testing is to check whether our application behaves the way we expect it to work. It also safeguards us against unwanted behaviour when changes are made. Tests make our application easy to maintain and can serve as documentation to understand what we expect from each component or function.
What should you test?
Large applications can make testing time-consuming hence it is essential to prioritize tests based on high-value features, edge cases, things that break easy, component testing, user interaction etc.
Types of test
The three most common types of testing in React are unit tests, integration tests and end-to-end testing. Unit testing is about testing a small part of the code - like a function. Integrations test combines multiple unit tests together into one test to check if they are working in sync in your application. Finally, end-to-end tests run from front-end to back-end. The goal is to simulate what a real user scenario looks like from start to finish.
Setting up React testing library
Next, let's go over the basic setup for React testing library. So the awesome part is CRA comes with React testing library right off the bat (check package.json). The name of every file we create for writing tests has to correspond with the component we are testing. For example, if we are testing a login component in Login.tsx then the test file will be called Login.test.js and so on. Once again if you take a look at package.json file you can see the script we need to run to execute our tests.
> npm run testAnatomy of Tests
Once we install CRA, it comes with a default App.test.js file which looks like -
// App.test.js
import { render, screen } from '@testing-library/react';
import userEvent from '@testing-library/user-event';
import '@testing-library/jest-dom/extend-expect';
import App from './App';

test('renders learn react link', () => {
  render(<App />);
  const linkElement = screen.getByText(/learn react/i);
  expect(linkElement).toBeInTheDocument();
});- Each test is contained inside a test block. We give it a description which can be used as reference for future.
- Now inside the test block first thing we do is render the component we want to test using the render function from React testing library which takes the component as an arguement.
- Next we find the elements we want to interact with (screen). It has multiple query methods to find these elements - getByText in this case which accepts a string as input and uses regular expression for case insensivity or if we want to make partial matches. There are other query methods available to us like - queryBy, findBy, getAllBy, queryAllBy, findAllBy. Now this raises a question as to when to use which method. Every time you are asserting that an element isn't there, use queryBy, otherwise default to getBy and for asynchronous elements use findBy. These queries follow a hierarchy based on the priority list which you can read more about here.
- The above code block just checks if the text is present, but most times we want to imitate how a user will interact with our application through click events, type events, drag events etc. In these situations we use userEvent but there is also an option to use fireEvent. Behind the scenes, userEvent uses the fireEvent. You can consider fireEvent being the low-level api, while userEvent provides more advanced simulation of browser interactions.
- The last thing is to assert that the results are as expected (expect) which either make our test pass (green) or fail (red).
Unit Test
Let's say we have a login component Login.tsx. It has two inputs for email, password and buttons to login, cancel. Our app is designed in such a way that on page load login button is disabled by default and once we enter credentials the button becomes enabled. Now, this is a feature we could write automated tests for rather than checking manually on separate occasions.


// Login.test.js

import { render, screen } from '@testing-library/react';
import userEvent from '@testing-library/user-event';
import Login from './Login.tsx';

test('on intial render, login button is disabled', () => {
  render(<Login />);

  expect(screen.getByRole('button', { name: /login/i })).toBeDisabled();
});

test('if email and password is entered the login button becomes enabled', () => {
  render(<Login />);

  userEvent.type(screen.getByPlaceholderText(/email/i), 'john@mail.com');
  userEvent.type(screen.getByPlaceholderText(/password/i), 'password');

  expect(screen.getByRole('button', { name: /login/i })).toBeEnabled();
});
Ok let's go over what is going on in the above code. We have two test blocks -
- First one simply checks if the login button is disabled on initial render.
- We import our component which we are testing and use the render method to let the test know which component to check.
- Next we simply write our assertion to check if the button is disabled.
- We are using the getByRole query method to get the button element as it is on top of the priority list in their documentation. We provide the name of the button so the test knows which button we are testing since there are two buttons in the same component.
- Second test block checks if the button is enabled once user enters email and password.
- Once again we render the component we are testing.
- Next up we are using userEvent and as you can see it is imported from a companion library for Testing Library.
- We are checking for when the user 'types' in to the input and to get hold of the element we are using placeholder text since these inputs do not have any label.
- Finally we are asserting that the button becomes enabled when values are passed to the inputs.
Testing with React Router components
Let's say we have a component we want to test which has a Link component from react router inside it.
// Header.jsx

import React from 'react';
import { Link } from 'react-router-dom';

export const Header = ({ username }) => {
  return (
    <div className="header">
      <p>Welcome, {username}</p>
      <Link to="/gallery">Gallery</Link>
    </div>
  );
};
Now if we go ahead and test this component to check if the username is being displayed like we have tested in the earlier examples we will run into an error.
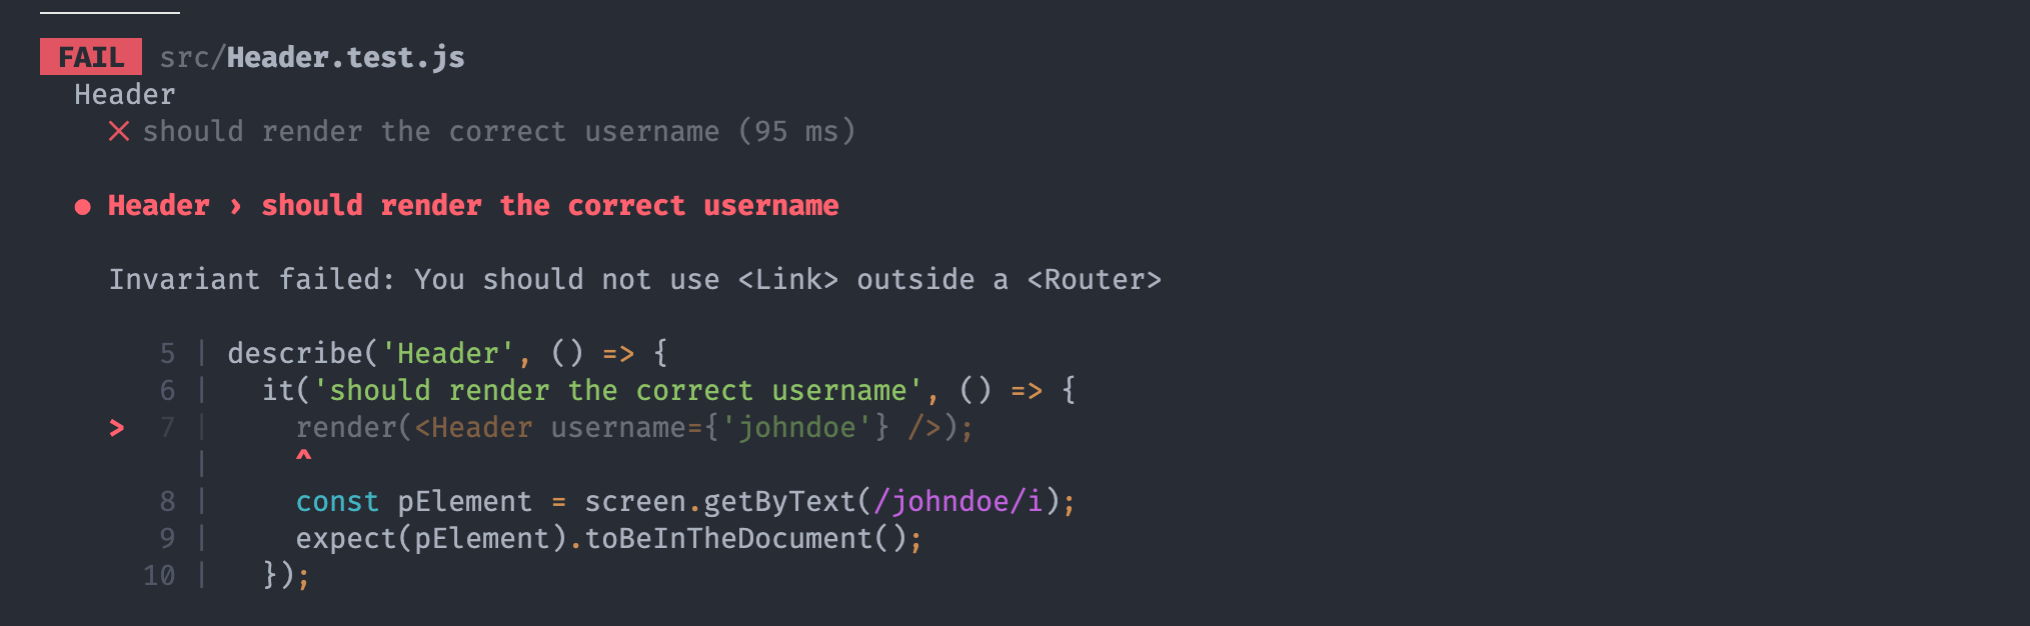
Invariant failed: You should not use <Link> outside a <Router>This makes sense because we are testing our Header component in complete isolation so it is not going to be wrapped with BrowserRouter which is required for react router components. So what we can do is create a component that wraps the Header component with BrowserRouter.
// Header.test.js
import { render, screen } from '@testing-library/react';
import { Header } from '../Header';
import { BrowserRouter } from 'react-router-dom';
const MockHeader = ({ username }) => {
return (
<BrowserRouter>
<Header username={username} />
</BrowserRouter>
);
};
describe('Header', () => {
it('should render the correct username', () => {
render(<MockHeader username={'johndoe'} />);
const pElement = screen.getByText(/johndoe/i);
expect(pElement).toBeInTheDocument();
});
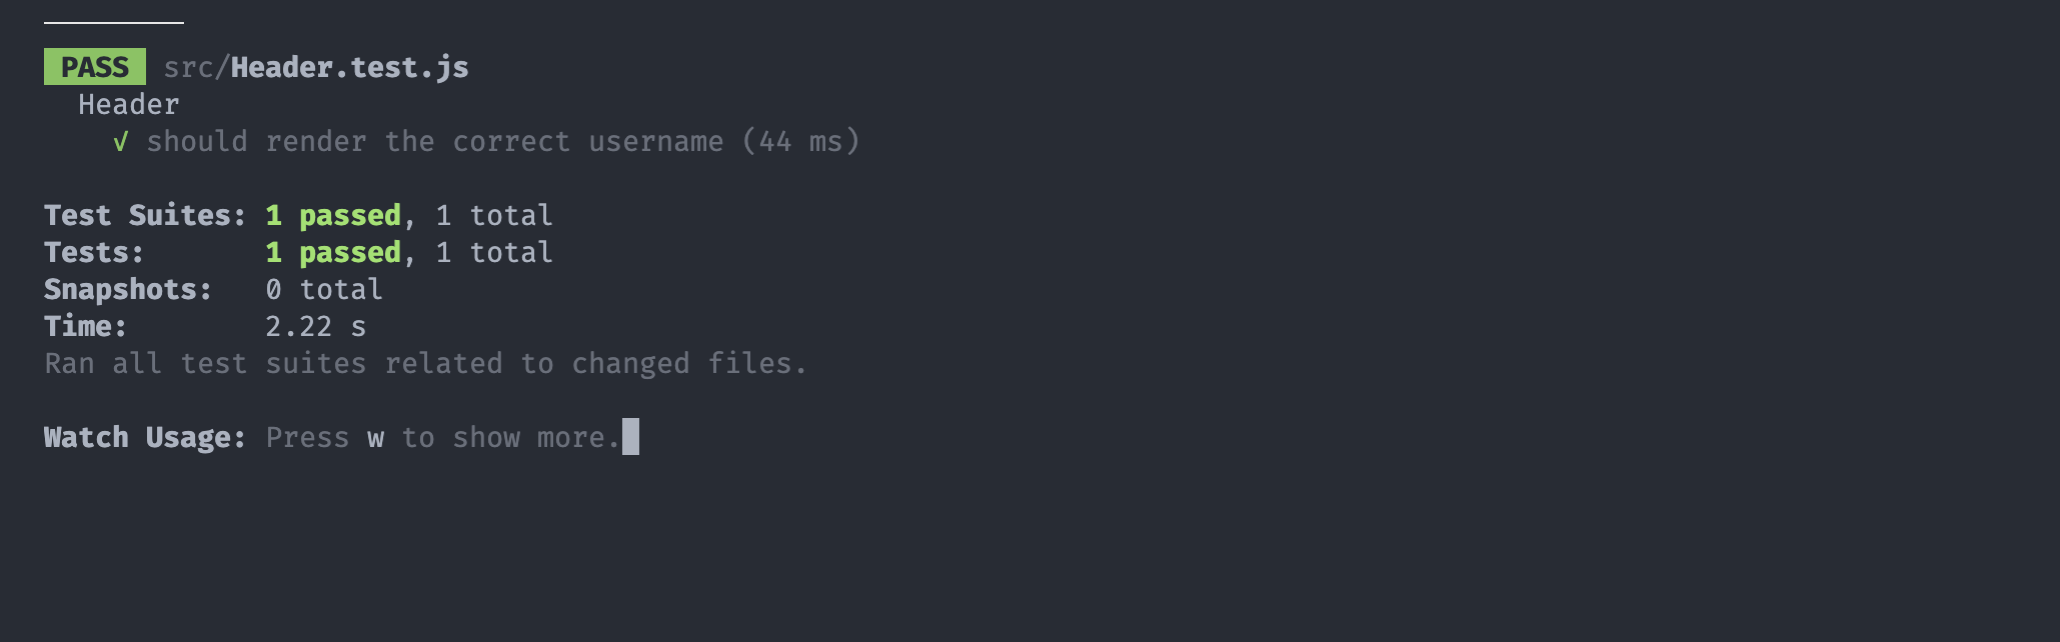
});Now our test should work just fine. Also you may have noticed we have introduced describe, it simply helps us group common tests together. So if we add more tests for our Header component we can put them all inside the same describe block
Testing Async components
Below we have a ProductsList component which makes a GET request to an external API, gets the data and renders it in a list. Now we want to test that we get one of the product and it is rendered on to our page. Because it is asynchronous, the data wont be availabe on render and we will not be able to find the element on page load and it will make our test fail. To combat this issue we can use async await and findBy
// ProductList.jsx

import React, { useEffect, useState } from 'react';
import './ProductsList.css';
import axios from 'axios';

export default function ProductsList() {
  const [products, setProducts] = useState([]);

  useEffect(() => {
    fetchProducts();
  }, []);

  const fetchProducts = async () => {
    const { data } = await axios.get('https://fakestoreapi.com/products');
    setProducts(data.results);
  };

  return (
    <div className="productslist-container">
      <div>
        {products.map((product, index) => (
          <div className="product-item" data-testid={`product-item-${index}`}>
            <img src={product.image} />
            <div className="products-details">
              <div className="product-item-name">
                <h4>{product.title}</h4>
                <h4>{product.category}</h4>
                <h4>{product.price}</h4>
              </div>
              <p>{product.description}</p>
            </div>
          </div>
        ))}
      </div>
    </div>
  );
}
Before we test our application, we need to create mock data so we can avoid making requests to the API every time we run our tests because it can become expensive, slow and dependency on external data can make our tests flaky. Instead, we make a mock request and get back some dummy data that will be in the same structure as the data sent by API.
// __mock__/axios.js

const mockResponse = {
  data: {
    results: [
      {
        id: 1,
        title: 'Computer',
        price: '100',
        category: 'Electronics',
        description: 'Lorem Ipsum and more',
        image: 'https://fakestoreapi.com/img/81QpkIctqPL._AC_SX679_.jpg',
      },
    ],
  },
};

export default {
  get: jest.fn().mockResolvedValue(mockResponse),
};
Side note: React by default will reset our mock every single time which will make the test fail. To fix this we need to make a change in the package.json file.
"jest": {
  "resetMocks": false
}
In our test we will make use of the beforeEach hook to get the mock data before each test is run. Other important hooks to know about are beforeAll, afterEach and afterAll.
// ProductList.test.js

import { render, screen } from '@testing-library/react';
import ProductsList from '../ProductsList';

describe('ProductsList', () => {
  beforeEach(() => {
    // console.log("RUNS BEFORE EACH TEST")
    jest.mock('../../../__mocks__/axios');
  });

  it('should fetch and render a single product', async () => {
    render(<MockProductsList />);
    const productDivElement = await screen.findByTestId(`product-item-0`);
    expect(productDivElement).toBeInTheDocument();
  });
});
Integration Test
// Login.test.js
test('if email and password is entered the login button becomes enabled', () => {
  render(<Login />);

  expect(screen.getByRole('button', { name: /login/i })).toBeDisabled();

  userEvent.type(screen.getByPlaceholderText(/email/i), 'john@mail.com');
  userEvent.type(screen.getByPlaceholderText(/password/i), 'password');

  expect(screen.getByRole('button', { name: /login/i })).toBeEnabled();
});
Going back to our first login example - it would make sense to combine those two unit tests into a single integrations test as it better resembles how a user would use our application. Integrations test is not about combining unit tests into one test, however, if combining multiple unit tests into a single integrations test resembles a more realistic user flow then it would be the recommended way.
Conclusion
We have only scratched the surface of React testing library. To go more in-depth it is best to go through their documentation which has everything explained in detail. In the next article, we will go over End-to-end testing with Cypress.